Objectives
This exercise involves creating and running a very basic Zeek script.
Exercise 1
Description: In this first exercise, we will create the traditional “Hello, World!” that is typical of a first attempt at programming in a new language.
Using any editor of your choice that is installed on the VM, please create a script that will generate the string “Hello, World!” at the console when it is executed with Zeek.
Since Zeek is a C-like language, it shares many very familiar syntactical and grammatical similarities. A list of a few similarities is:
• Functions and events are defined using a type, a name, and a parameter list.
• Parameter lists are contained within parentheses.
• The types of all variables passed as parameters must be defined.
• The end of a statement is delimited with a semicolon ;.
• Sections of code are all contained within curly-braces {}.
The first step is to create a file to put my script into. I am going to name my script first.zeek.

The next step is to determine which Zeek events will serve my needs. I want an event that will fire every time Zeek starts up.
After searching through the Zeek documentation, I found an event called “zeek_init()” that seems to be the correct event. It is triggered every time Zeek starts.
Regarding Module Name, my SEC 503 very strongly recommended that I develop the habit of prefixing all of my scripts with the module keyword and a name (example: module MyFirstScript;)
This statement defines a namespace within which all of my global variables, functions, and events exist. When I do this, other scripts can still access my global variables, functions, and events by prefixing them with the MyFirstScript:: namespace operator, and it protects me from inadvertently overwriting existing variables, events, and functions in the global namespace.
With the event information, I simply need to define my event and instruct Zeek as to what it should do when the event fires. In my case I want Zeek to print out “Hello, world!” when Zeek runs.
Putting it all together:
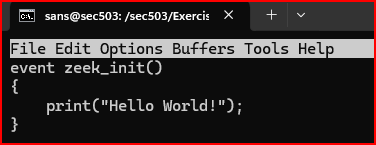
Let’s test this script and see if it runs properly:

It worked!!!
Leave a Reply